
Espresso Extraction Explained for Serious Coffee Lovers
Espresso is one of the most misunderstood brewing methods in coffee. Most people assume it’s just about dark roasts and small cups. The reality is far more precise. What is espresso extraction explained in its truest sense? It’s a controlled physical and chemical process where pressure, temperature, grind size, and time interact to pull flavor compounds out of coffee in a specific sequence. Get any one variable wrong and the shot falls apart. Get them right and you produce something complex, syrupy, and deeply satisfying.
Table of Contents
- Key takeaways
- What is espresso extraction, explained from the ground up
- How the variables shape flavor
- Advanced preparation for extraction consistency
- Pressure profiling, pre-infusion, and equipment quality
- How to dial in espresso shots step by step
- My take on what actually matters
- Start with coffee worth extracting
- FAQ
Key takeaways
| Point | Details |
|---|---|
| Pressure is the defining variable | Espresso uses roughly 9 bars of pressure, extracting flavor 5 to 10 times faster than gravity brewing methods. |
| Extraction happens in phases | Acids extract first, then sweetness and body, then bitterness. Balanced shots require all three phases to complete properly. |
| Grind size controls flow rate | A 1 to 2 micron change in grind size noticeably shifts flow resistance, timing, and flavor in the cup. |
| Preparation technique matters more than machine cost | Consistent distribution and tamping reduce channeling more reliably than upgrading to expensive equipment. |
| Taste, not time, is the final judge | A shot pulling at 32 seconds that tastes balanced is correct. A sour shot at 22 seconds still needs adjustment. |
What is espresso extraction, explained from the ground up
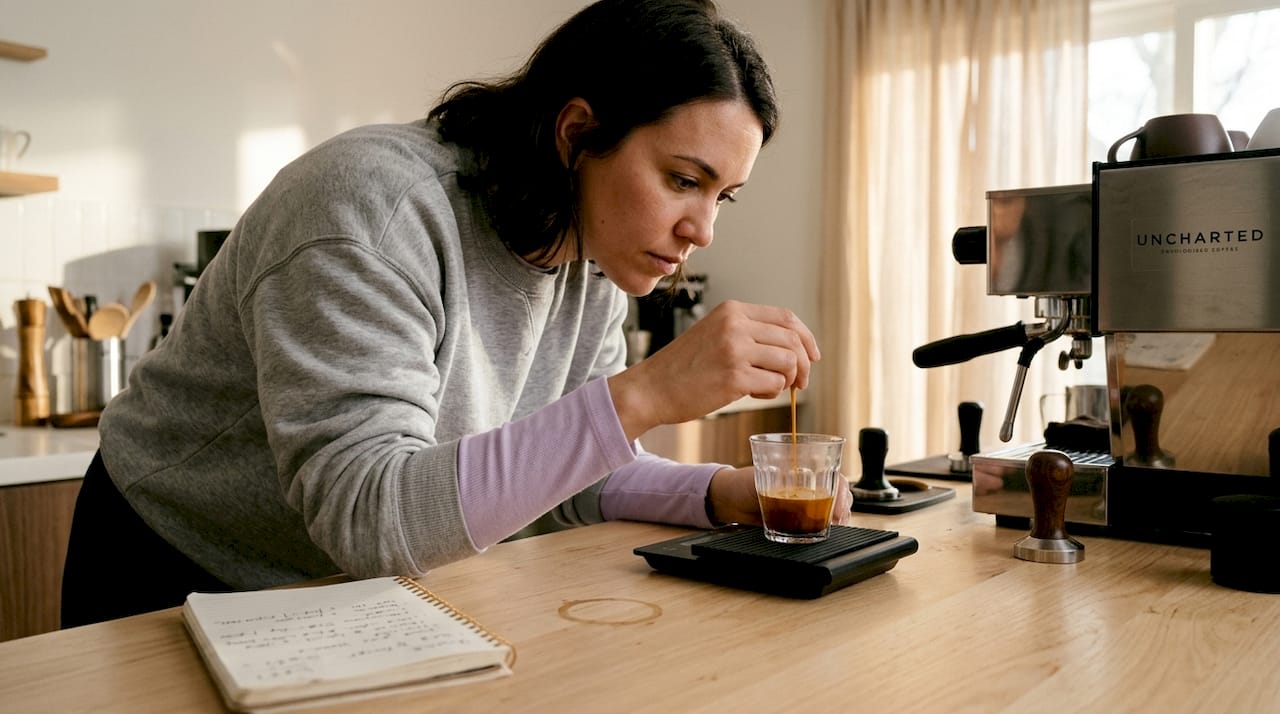
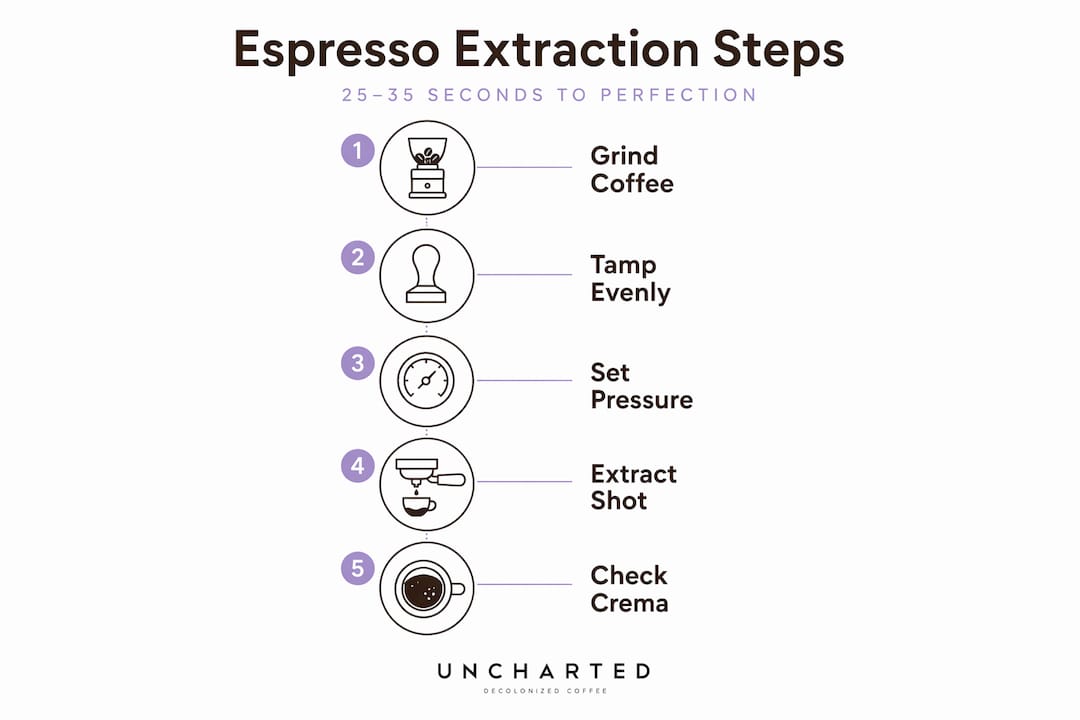
Espresso extraction is the process of forcing hot water through finely ground coffee at approximately 9 bars of pressure, typically over 25 to 30 seconds. That pressure is roughly nine times atmospheric, which is what drives the rapid dissolution of solids and the emulsification of oils that you do not get from pour-over or drip methods. The result is a concentrated shot of coffee with a distinctly syrupy texture and a layer of crema on top.
That crema is not decoration. It forms when carbon dioxide trapped in the coffee grounds gets released under pressure, creating a stable oil-water emulsion. It’s a visual indicator of freshness and extraction quality. Dead, flat crema usually means stale beans or poor extraction mechanics.
The equipment that makes it possible
You cannot produce real espresso without a few specific tools:
- Espresso machine: Delivers calibrated pressure and temperature. Consumer machines range from simple pump-driven units to machines with dual boilers and electronic pressure profiling.
- Burr grinder: Consistent particle size is non-negotiable. Burr grinders cut coffee to uniform size. Blade grinders shatter it into a chaotic mix that extracts unevenly and kills flavor clarity.
- Portafilter and basket: The basket holds your coffee puck. Basket diameter and depth should match your dose to avoid under-filled or over-compressed pucks.
- Scale: Dosing by weight rather than volume removes one major source of inconsistency.
Standard practice for a double shot is an 18g dose yielding 36g of liquid espresso, a 1:2 brew ratio that has become the modern benchmark. You can adjust the ratio for different flavor profiles, but this is your calibration baseline.
| Parameter | Standard range | Effect of deviation |
|---|---|---|
| Dose | 17g to 20g | More dose increases body and resistance; less reduces both |
| Yield | 34g to 40g | Higher yield pulls more sweetness and dilutes concentration |
| Extraction time | 25 to 35 seconds | Shorter skews sour; longer skews bitter |
| Temperature | 90°C to 96°C | Lower favors light roasts; higher favors dark roasts |
| Pressure | 8 to 9 bars | Lower pressure reduces body and crema formation |
How the variables shape flavor
Understanding espresso extraction means understanding what happens chemically during those 25 to 35 seconds. The extraction sequence starts with acids, which are water-soluble and dissolve fastest. Then come the sugars that create sweetness and body. Last to extract are the bitter compounds, which only appear in meaningful quantities when the shot runs long or water temperature climbs too high.
This sequence is why timing matters at all. Pull a shot in under 22 seconds and you are tasting mostly acids with little sweetness to balance them. Let it run past 35 seconds and bitterness floods the finish. The goal is to let all three phases complete, in proportion, without one overwhelming the others.
Grind size: the most powerful adjustment
Grind size controls resistance. A finer grind creates more surface area and more friction, slowing water flow and extending extraction time. A coarser grind does the opposite. The difference of just 1 to 2 microns in particle size can shift your extraction time by several seconds, which directly changes what ends up in the cup.
When you are dialing in a new coffee or a new bag, grind size is the variable you reach for first. Keep dose and yield constant and move the grinder in small steps. You will hear the shot slow down or speed up before you taste the difference, which makes it a useful diagnostic tool even before you drink the shot.
Temperature tells a different story by roast level. Lighter roasts have denser bean structure and higher acidity, so they benefit from higher brew temperatures, closer to 94°C to 96°C. Darker roasts have more open structure and lower acidity, so pulling them at 90°C to 92°C prevents over-extraction of bitter compounds.
Pro Tip: If your shot tastes flat and sour but the timing looks fine, try raising brew temperature by 1°C before changing grind. Light roasts in particular often need more heat to unlock sweetness.
Advanced preparation for extraction consistency
A technically well-designed machine means nothing if the coffee puck inside the portafilter is inconsistent. Channeling, the process where water finds a path of least resistance through a crack or gap in the puck, is the most common reason shots taste uneven even when the recipe looks correct.
Here is a repeatable preparation sequence that minimizes channeling:
- Weigh your dose. Grind directly into the portafilter or a dosing cup and hit your target weight before anything else.
- Apply the Weiss Distribution Technique (WDT). Using a needle tool, stir through the grounds in a circular pattern before tamping. WDT tools with 0.35 to 0.4 mm needles break static clumps and even out puck density far more effectively than tapping the portafilter.
- Level before tamping. Ensure the coffee surface is even. A tamp tilt of as little as 2 to 3 degrees creates uneven resistance across the puck, inviting channeling.
- Tamp with steady, level pressure. About 15 to 20 kg of force with a flat base tamper creates a sealed, even surface. The exact pressure matters less than the consistency.
- Lock in and pull immediately. Do not let a tamped puck sit. Grounds settle and dry edges form that create micro-channels under pressure.
Pro Tip: After pulling a shot, break open the spent puck and look at it. A properly extracted puck holds its shape and shows uniform color throughout. Pale or wet spots signal channeling zones worth investigating in your prep.
This barista technique perspective on puck preparation mirrors what you see in professional coffee bars where volume and consistency are both demands.
Pressure profiling, pre-infusion, and equipment quality
Modern espresso machines offer two features that meaningfully influence extraction quality: pre-infusion and pressure profiling.
Pre-infusion means the machine delivers low pressure, roughly 2 to 3 bars for 3 to 8 seconds, before ramping to full extraction pressure. This gently wets the puck, reducing the shock that causes surface cracking and channeling. It is particularly useful with light roast coffees, which are denser and more prone to uneven wetting.
Pressure profiling goes further. Instead of a fixed 9-bar extraction, the machine ramps pressure up and down through programmed curves:
- Ramp-up phase: Builds pressure slowly to minimize channeling at the start of extraction.
- Peak phase: Full pressure extracts the bulk of sweetness and body.
- Declining phase: Reduced pressure toward the end softens bitterness in the finish.
The other hardware factor worth understanding is where to invest. Grinder quality impacts espresso taste more than machine price at the entry and mid levels. An excellent grinder paired with a solid entry-level machine will outperform a mediocre grinder paired with an expensive machine. PID temperature controllers, which maintain brew temperature within a fraction of a degree, matter more as your technique improves. At that point, the variable you have removed from your technique process is temperature drift, and the remaining flavor differences become genuinely attributable to your recipe choices.
How to dial in espresso shots step by step
Dialing in means finding the grind size, dose, and yield combination that produces a balanced, flavorful shot with a specific coffee. Here is how to do it without losing your mind in the process.
- Set your baseline recipe. Start with 18g dose, 36g yield, targeting 27 to 32 seconds of extraction at 93°C. These numbers reflect the standard double shot protocol that most specialty coffee professionals use as a starting point.
- Lock the dose. Do not adjust dose and grind at the same time. Change grind size only while keeping dose and yield constant. This is the fastest route to understanding what each adjustment actually does.
- Pull a shot and taste it. Do not just check the timer. Taste it. Sour and thin? Too fast, grind finer. Bitter and heavy? Too slow, grind coarser.
- Make one grind adjustment and repeat. Move in small steps. Large grind changes overshoot and you spend shots correcting in the wrong direction.
- Document everything. Write down grind setting, dose, yield, time, and your tasting notes. Memory is unreliable when you are pulling multiple test shots.
Taste is the final guide, not the timer. A shot that pulls in 32 seconds and tastes balanced is a good shot. A shot at 28 seconds that tastes flat and sour still needs a grind adjustment. Chasing time numbers instead of flavor is where most home baristas stall out.
Pro Tip: Keep a simple notes app or physical log at your machine. After ten or fifteen bags from the same roaster, you will notice patterns in how their coffees behave. That knowledge compounds. Your baseline recipe for their next release will be far more accurate from the first shot.
For more on how grind size shapes flavor at every stage of extraction, Uncharted Coffee has a practical breakdown worth reading alongside this guide.
My take on what actually matters
I have watched a lot of people get stuck in the espresso rabbit hole, obsessing over milliseconds and pressure curves while their coffee tastes mediocre because their distribution is sloppy or their grinder is producing fines that choke every shot. The precision that espresso demands is real, but it runs in a specific order of priority.
In my experience, the biggest leap in shot quality for most people comes from preparation technique before anything else. WDT, level tamping, weight-based dosing. Those three habits alone separate a frustrating home espresso experience from a genuinely rewarding one. Premium equipment alone does not compensate for inconsistent preparation, and I have seen shots from $500 setups beat shots from $3,000 setups because of this.
What I keep coming back to is this: extraction phases are a sensory language. When you taste your shots and recognize “that sourness is acids running ahead of the sweetness,” you stop guessing and start diagnosing. That shift from random adjustments to intentional ones is where the real skill lives. Trust your palate, document what you learn, and adjust one variable at a time. The machine is just a tool. You are the method.
— Jasmine
Start with coffee worth extracting
Everything in this guide assumes one thing: the coffee you are working with is worth the effort. That is where Uncharted Coffee comes in.

Uncharted Coffee sources regeneratively grown beans with the kind of flavor complexity that rewards precise extraction. When you dial in a shot from their core espresso collection, you are tasting what happens when sourcing intention meets brewing skill. Their Revive Cold Brew, grown in Costa Rica’s highlands, is a standout example of how terroir translates directly into the cup. Explore the range and find the coffee that challenges you to become a better barista.
FAQ
What is espresso extraction in simple terms?
Espresso extraction is the process of forcing hot water at 9 bars of pressure through finely ground coffee to dissolve flavor compounds into a concentrated liquid. It produces a small, syrupy shot with a layer of crema in roughly 25 to 35 seconds.
What is the ideal espresso extraction time?
The standard target is 25 to 35 seconds, but time is an indicator rather than an absolute rule. A shot that tastes balanced at 32 seconds is correct even if it falls outside a textbook range.
What causes bitter espresso?
Bitterness results from over-extraction, where bitter compounds dissolve in the final phase of the shot. It typically happens when grind size is too fine, brew temperature is too high, or the shot runs too long past 35 seconds.
How does grind size affect espresso extraction?
Finer grinds increase surface area and flow resistance, slowing the shot and extracting more compounds. Coarser grinds reduce resistance and speed extraction. A shift of just 1 to 2 microns in particle size can change extraction time and flavor noticeably.
Why does channeling happen in espresso?
Channeling occurs when water finds a path of least resistance through a crack or gap in the coffee puck, extracting unevenly. It is most often caused by uneven distribution, a tilted tamp, or a dose that does not fill the basket correctly.